
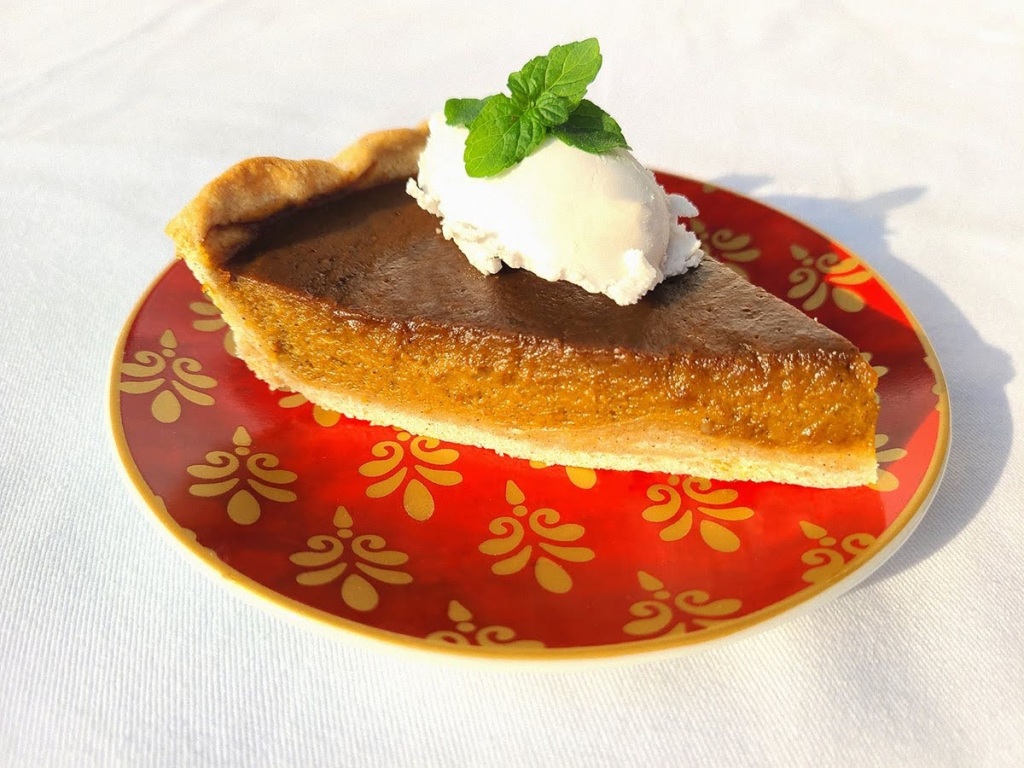
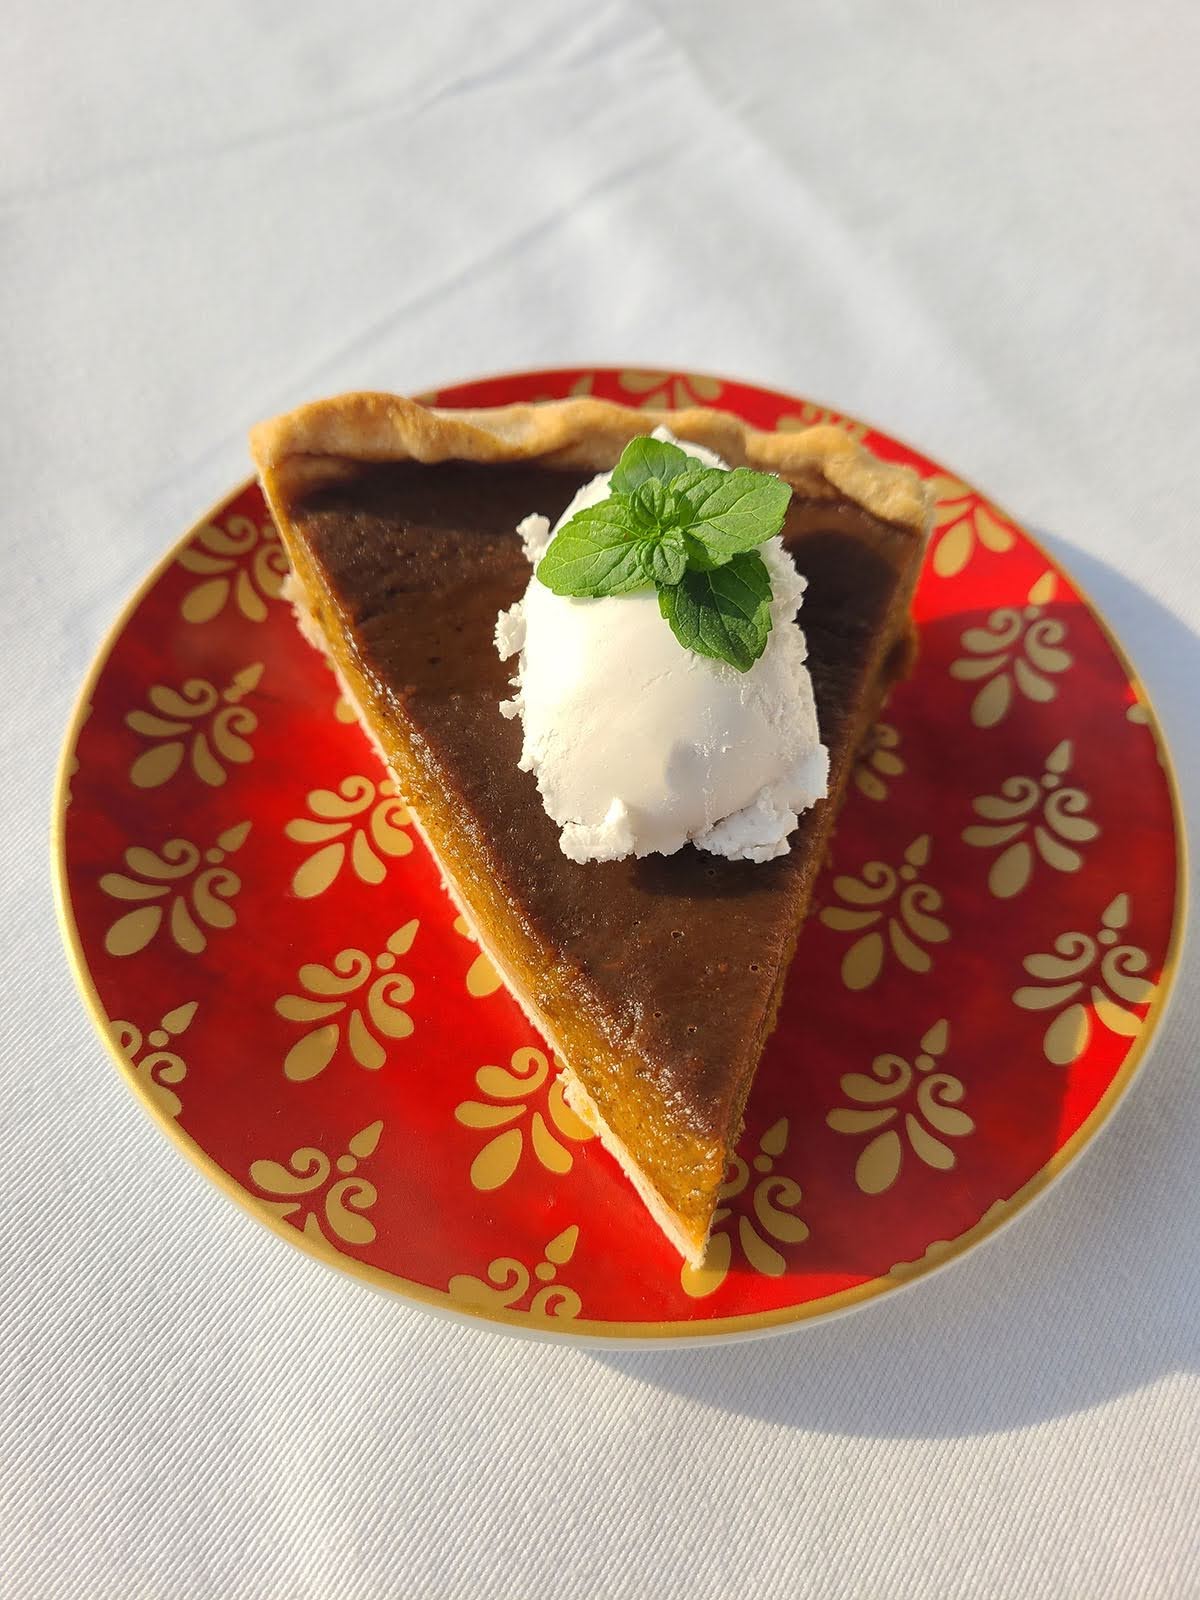
My Grandma Vi’s cherished pumpkin pie recipe! This spectacular pumpkin pie packs a lot more spice than your average pumpkin pie, featuring a darker custard flavour and a light buttery crust. Pair it with whipped cream or ice cream for an extra delectable treat. It’s the perfect decadent dessert for fall or winter; bring one to a Halloween party, Thanksgiving gathering or Christmas get-together. Including tips, tricks and troubleshooting for perfect pie.
This pumpkin pie recipe is a family favourite from my Grandma Vi. Born in 1919, she lived through a lot during her life, and she could do just about anything. In the second world war she worked as a riveter. She could preserve jam, pickle vegetables, catch fish, build garden planters that looked like Canada geese, make elaborate dollhouse furniture out of old tin cans so that they looked like fancy chairs fit for a queen complete with wee velvet cushions… and also make amazing pumpkin pie. Peanut butter cookies too, but that’s for another time. I love this pumpkin pie recipe, and store-bought pie honestly is not at all comparable. Adding mace to the pie spices makes a big difference for me, and always makes me think of her. I hope you enjoy the recipe!
Recipe for Pumpkin Pie in Zelda, Breath of the Wild and Tears of the Kingdom: Pumpkin, Wheat, Sugar & Butter
Again, I will say it: I really don’t think some of the creators of the food items in Zelda Breath of the Wild and Tears of the Kingdom were big cooks or bakers. The fact that the Zelda pumpkin pie recipe is pumpkin, wheat, sugar, and BUTTER… it should be milk!! It’s a custard! Sorry, I’m just a bit passionate about this. Yes, the crust might contain butter, but the milk is pretty essential to pumpkin pie… as are eggs for that matter. I know, I know – all the pies in Breath of the Wild have the same base of wheat, flour, and sugar. THIS IS NO EXCUSE. UNACCEPTABLE!! (to quote Lemongrab)
But I’m sure eating a slice of pumpkin pie after a big lynel fight in the coliseum is just great. I just wish it had milk and eggs in it. *grumbles loudly*
By comparison, the pumpkin pie of Stardew Valley is a bit closer to the real deal, although I don’t think using the kitchen in Stardew is as much fun as the BOTW cooking pot.
That being said, Stardew pumpkin pie is a lot more energizing for you than the Hyrulian pumpkin pie is healing. I really wish the pie could be more healing in Zelda. I just want to eat more pie!
Recipe for Pumpkin Pie in Stardew Valley: Pumpkin, Wheat, Sugar & Milk
Did you know that pumpkin pie can be used on Emily’s sewing machine in Stardew Valley to make the holiday shirt? I mean, what?! I think I’d rather eat mine, but it’s cool to know, right? In terms of wooing and gifting, almost everybody likes pumpkin pie except Willy, Leo and Krobus. And then there’s Marnie – she LOVES pumpkin pie. Adores it. Also what better thing is there to cook in your brand new kitchen from Robin than pumpkin pie? Especially after you just grew a gazillion pumpkins for fall, am I right?
A quick word on decorating your pie – did you know you can decorate the pie edges with dough “decorations” like leaves, braided coils, pumpkin stamps, or whatever you like! To make enough dough for this, or if you have a bigger pie plate, I’d suggest doubling the dough recipe, and possibly also to make a quarter/fourth more of custard filling. Just something to keep in mind.
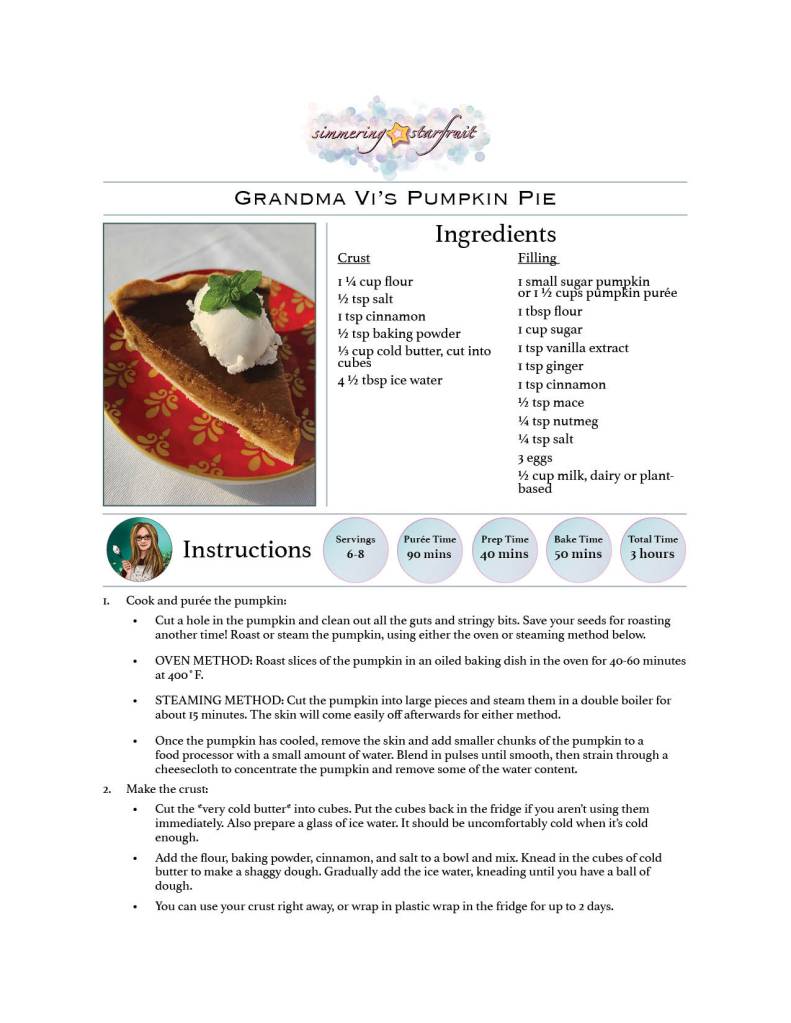
Grandma Vi’s Pumpkin Pie
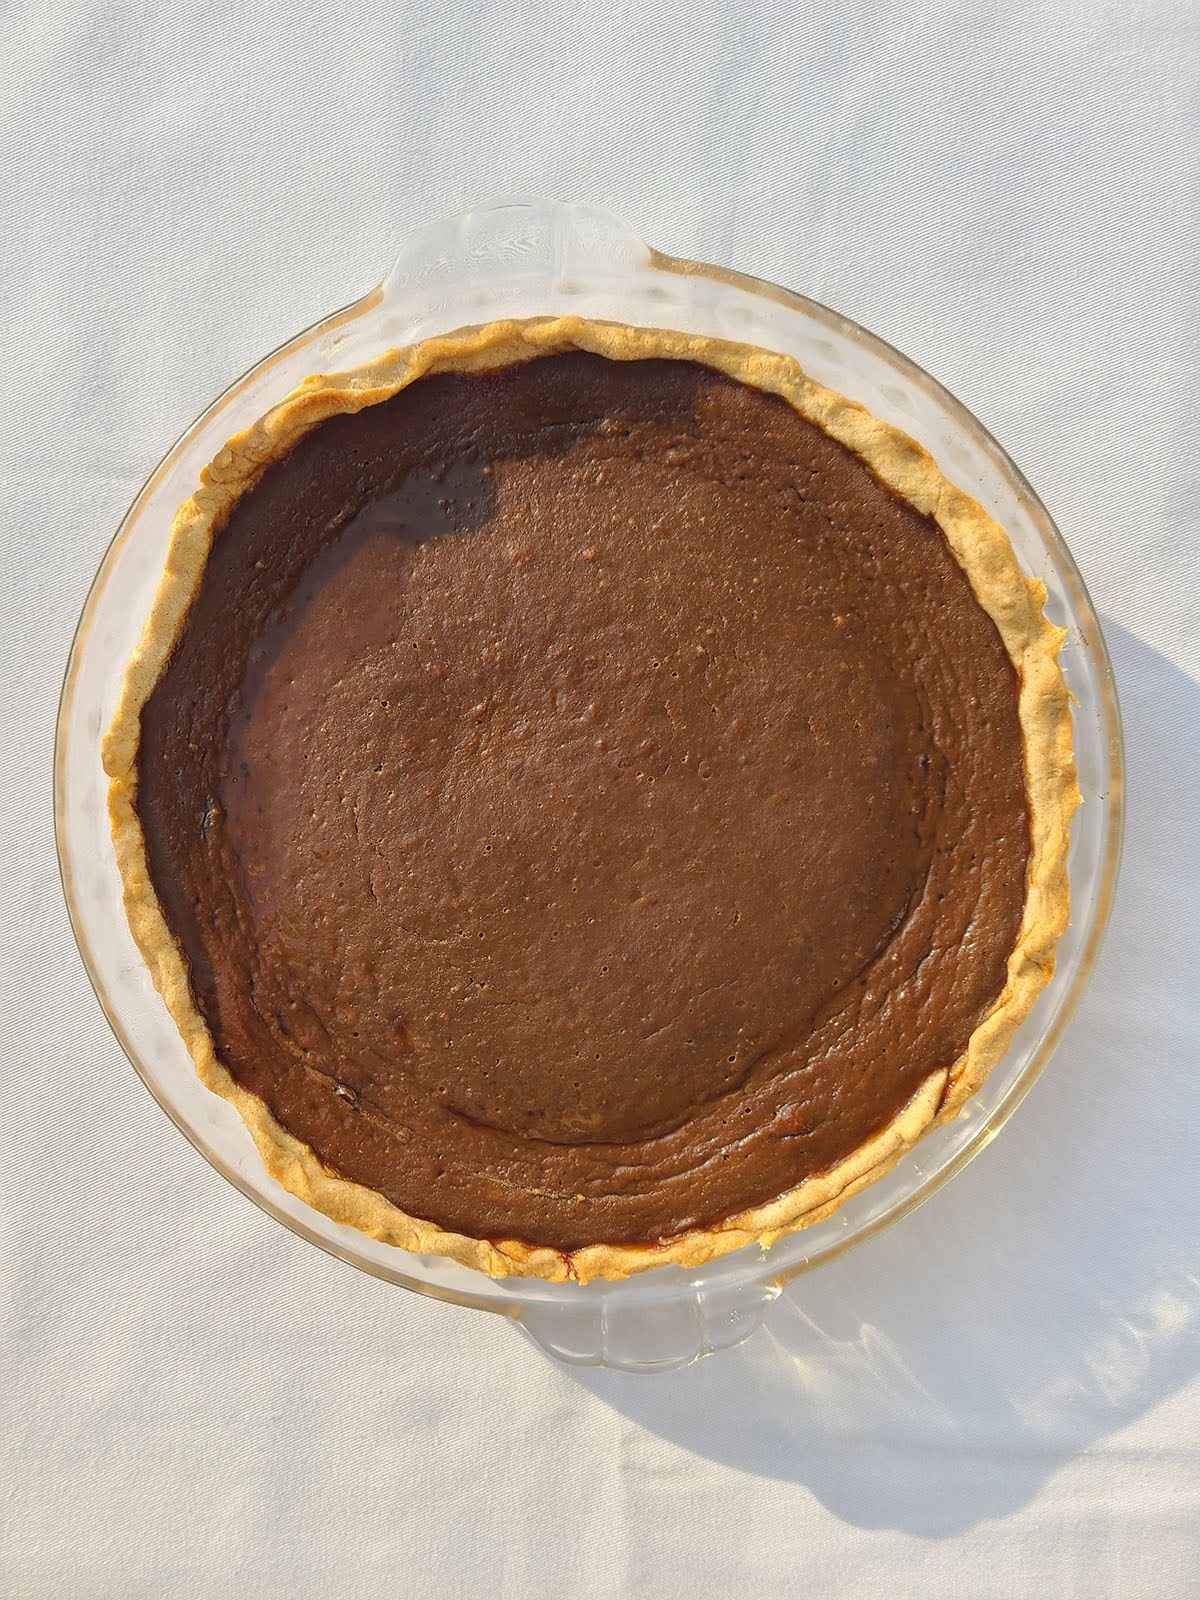
My grandma’s amazing pumpkin pie recipe. This recipe makes one standard 9″ pumpkin pie, which serves 6-8 people. Ready in 90 minutes, excluding pumpkin roasting and purée time.
Ingredients
Crust
- 1 ¼ cups flour
- ½ tsp salt
- 1 tsp cinnamon
- ½ tsp baking powder
- ⅓ cup cold butter, cut into cubes
- 4 ½ tbsp ice water
Custard Filling
- 1 ½ cups pumpkin puree
- 1 tbsp flour
- 1 cup sugar (or ½ cup packed brown sugar and ½ cup white sugar)
- 1 tsp vanilla extract
- 1 tsp ginger
- 1 tsp cinnamon
- ½ tsp mace
- ¼ tsp nutmeg
- ¼ tsp salt
- 3 eggs
- ½ cup dairy or plant-based milk
Tools
- pie plate (9 inch / 23 cm diameter recommended, but 8″ or 10″ would also be fine)
- roasting pan or double boiler (if using fresh pumpkin)
- food processor (if using fresh pumpkin)
- cheesecloth (if using fresh pumpkin)
- cutting board
- knife
- glass or bowl with some ice cubes
- mixing bowls
- small bowl for cracking and pre-beating the eggs
- mixing spatula
- measuring spoons
- measuring cup
- pie shield (or baking foil)
- oven mitts
- cooling rack
Instructions
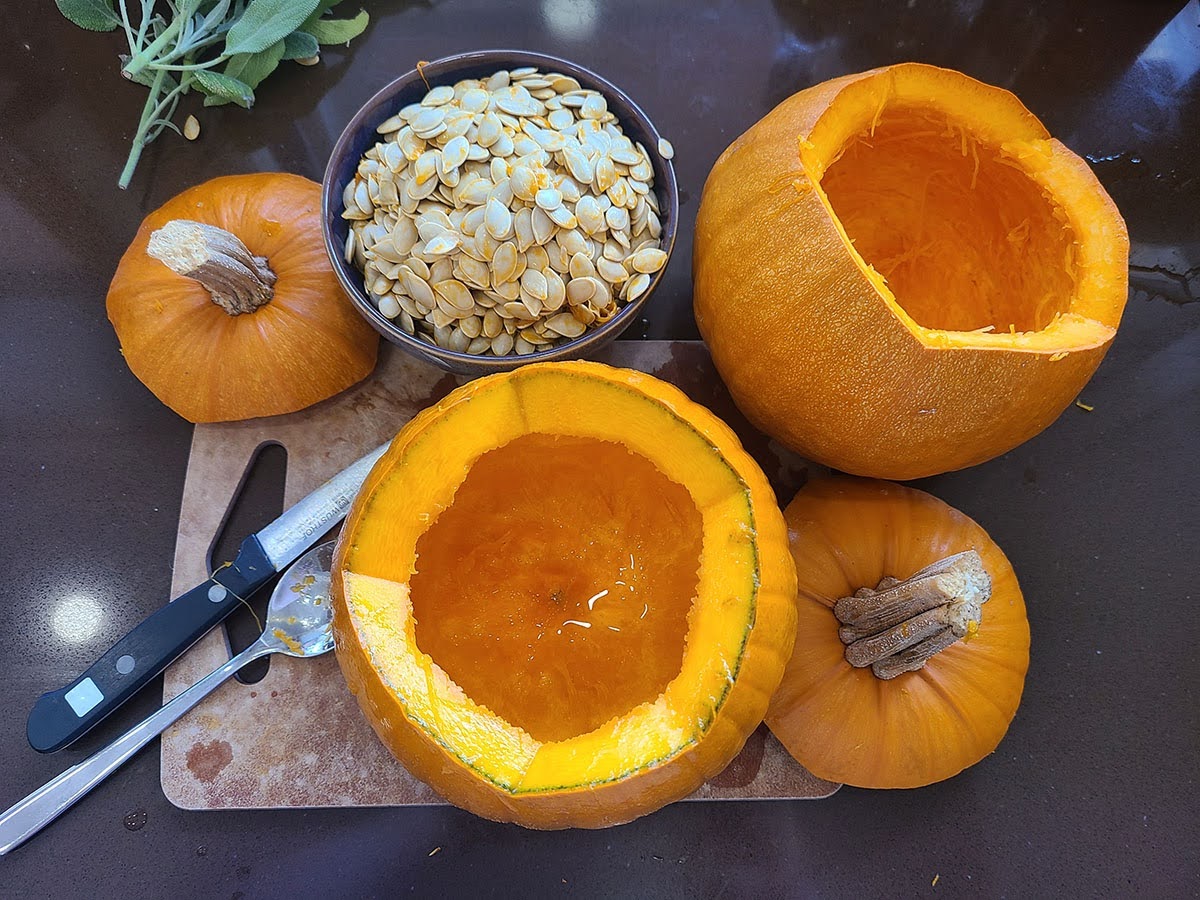
1. Clean, cook and purée the pumpkin.
Cut a hole in the pumpkin and clean out all the guts. Save your seeds for roasting another time! To cook the pumpkin, you can roast or steam it using one of these methods below:
OVEN METHOD
- Roast slices of the pumpkin in an oiled baking dish in the oven for 40-60 minutes at 400˚F.
STEAMING METHOD
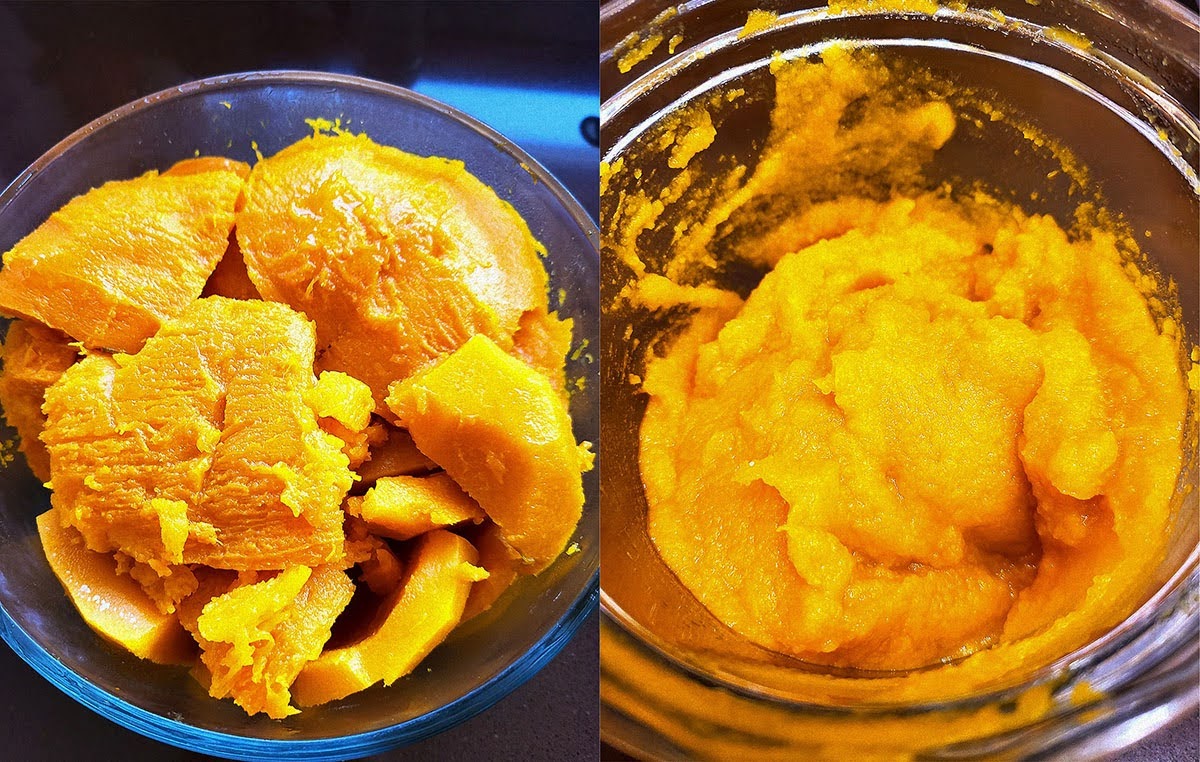
- Cut the pumpkin into large pieces and steam them in a double boiler for about 15 minutes. The skin will come easily off afterwards for either method.
Once the pumpkin has cooled, remove the skin and add smaller chunks of the pumpkin to a food processor. Blend in pulses until smooth.
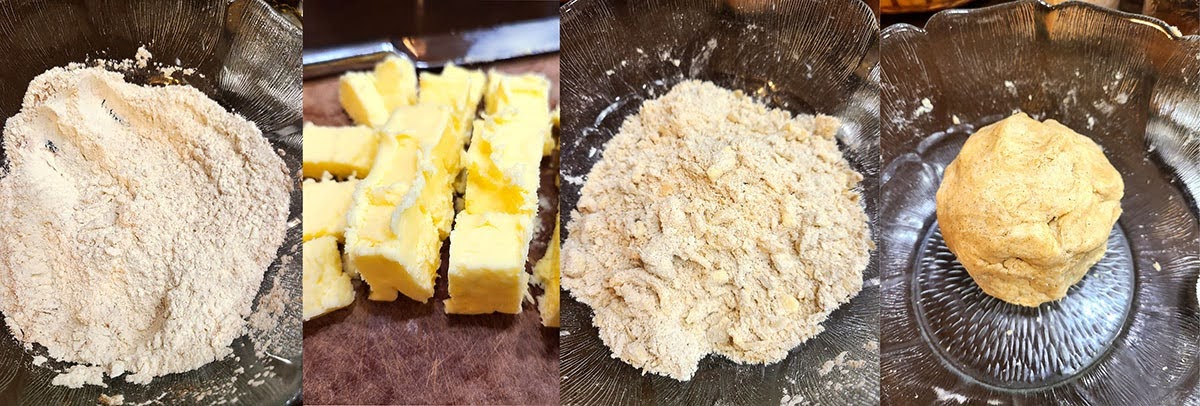
2. Make the crust.
- Cut the *very cold butter* into cubes. Put the cubes back in the fridge if you aren’t using them immediately.
- Prepare a glass of ice water. It should be uncomfortably cold when it’s cold enough.
- Add the flour, baking powder, cinnamon, and salt to a bowl and mix.
- Knead in the cubes of cold butter to make a shaggy dough.
- Gradually add the ice water, kneading until you have a ball of dough.
You can use your crust right away, or wrap in plastic wrap in the fridge for up to 2 days. Refrigerating your crust for a day can actually render a better crust sometimes.
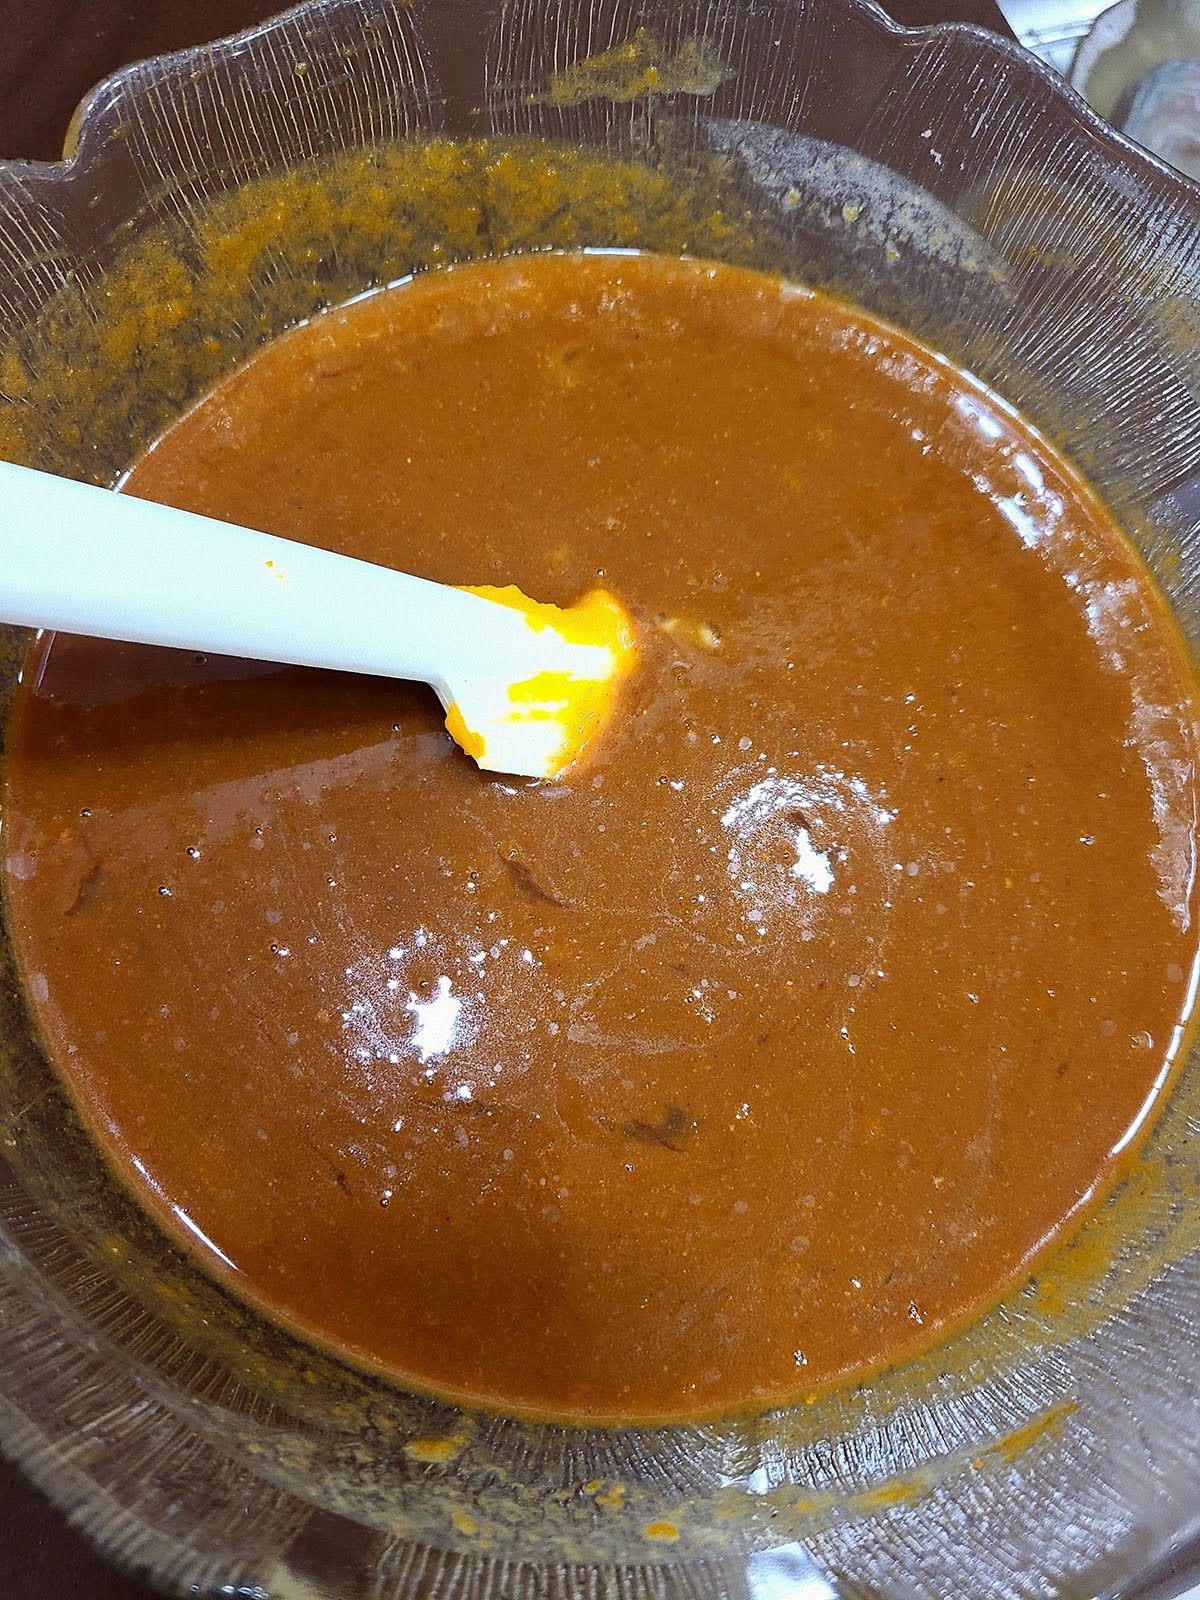
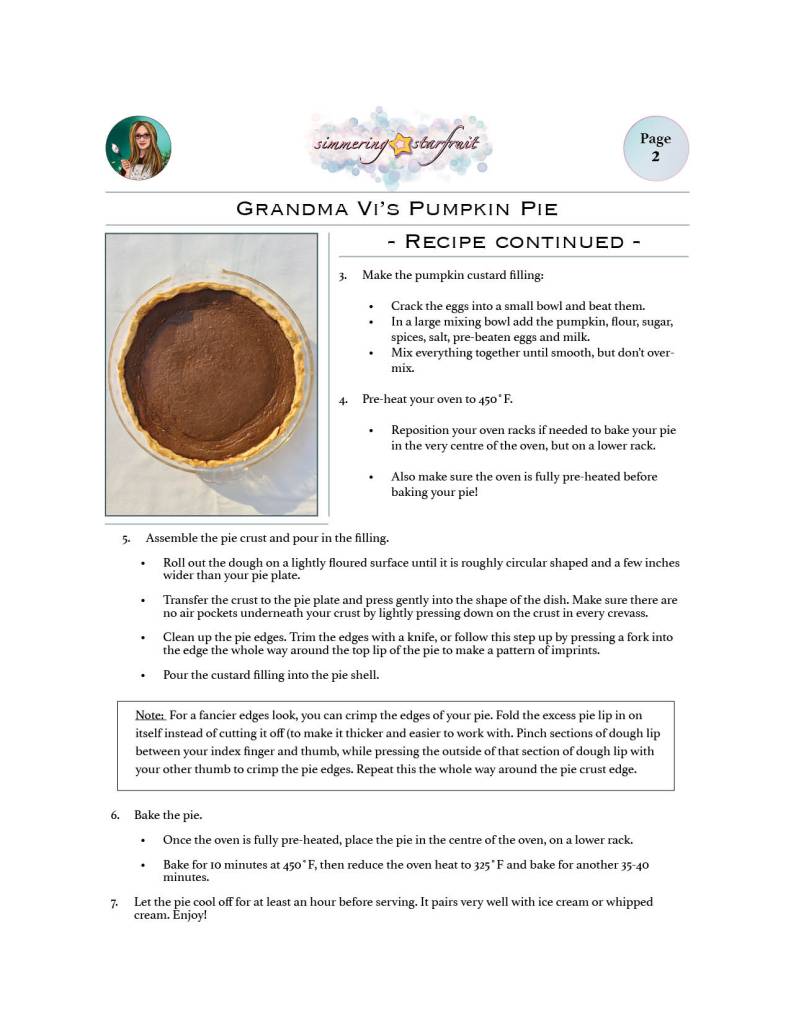
3. Make the pumpkin custard filling.
- Crack the eggs into a small bowl and beat them.
- In a large mixing bowl add the pumpkin, flour, sugar, spices, salt, pre-beaten eggs and milk. Mix together until smooth, but don’t over-mix.
4. Pre-heat your oven to 450˚F.
Make sure to reposition your oven racks if needed to bake your pie in the very centre of the oven, but on a lower rack. Also make sure the oven is fully pre-heated before baking your pie!
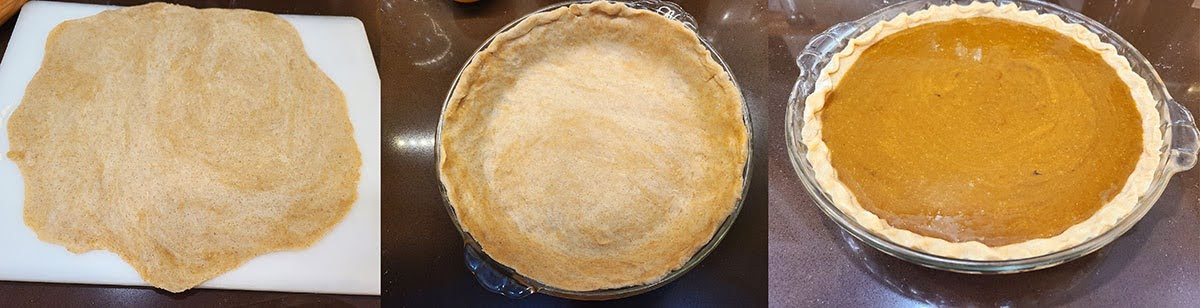
5. Assemble the pie crust and filling.
- Roll out the dough on a lightly floured surface until it is roughly circular shaped and a few inches wider than your pie plate.
- Transfer the crust to the pie plate and press gently into the shape of the dish. Make sure there are no air pockets underneath your crust by lightly pressing down on the crust.
- Clean up the pie edges. You can simply trim the edges with a knife, or follow this step up by pressing a fork into the edge the whole way around the top lip of the pie to make a pattern of little imprints.
- Now you’re ready to pour the custard filling into the pie shell.
*For a fancier edges look, you can crimp the edges of your pie. Fold the excess pie lip in on itself instead of cutting it off (to make it thicker and easier to work with. Pinch sections of dough lip between your index finger and thumb, while pressing the outside of that section of dough lip with your other thumb to crimp the pie edges. Repeat this the whole way around the pie crust edge.
*If you want to add any extra dough embellishments to your pie, now is the time!
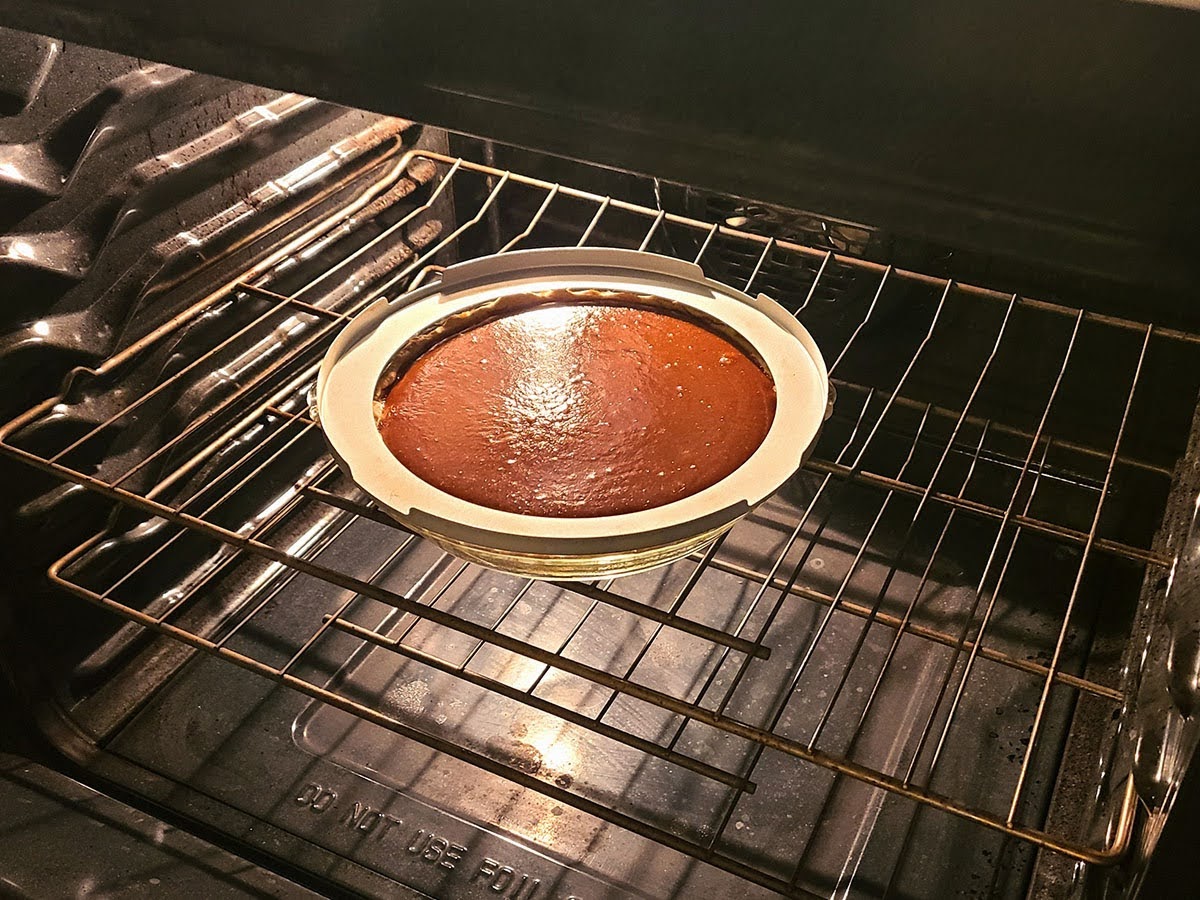
6. Bake the pie.
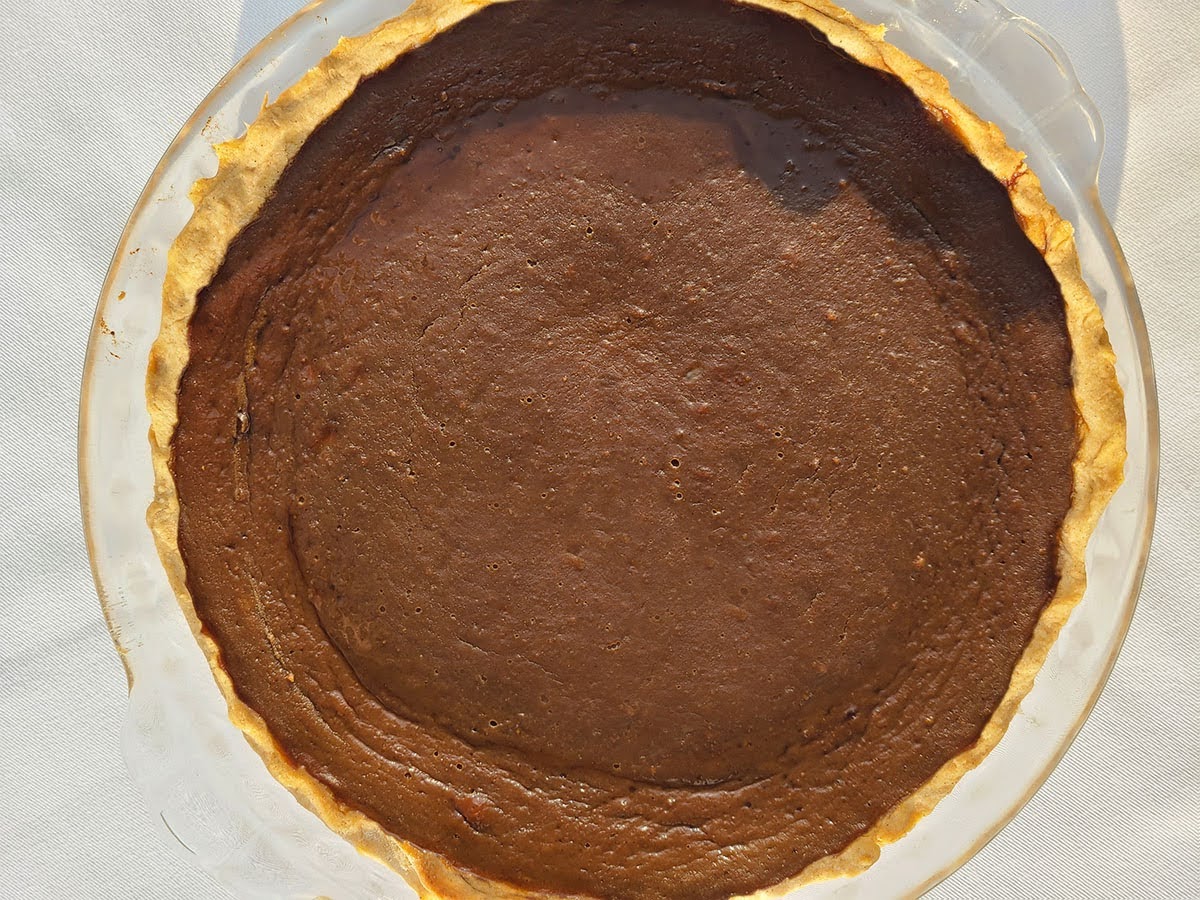
- Once the oven is fully pre-heated, put the pie in the centre of the oven, on a lower rack. Bake for 10 minutes at 450˚F, then reduce the oven heat to 325˚F and bake the pie for another 35-40 minutes.
- Let the pie cool off for at least an hour before serving. It pairs very well with ice cream or whipped cream. Enjoy!
A Note On Pie Shields
You might want to consider using a pie shield so the crust doesn’t burn. I usually add mine after 10 minutes at 325˚F (20 minutes into the total baking time).
If you don’t own a pie shield, don’t worry – you can make one out of baking foil! Measure the circumference of the top lip of your pie plate, then cut a piece of foil that is a little bit longer than this. The Foil piece should be about 3-4 inches wide.
For example, my freshly-cut foil pie shield might measure 32 inches long and 4 inches wide.
Then, fold the foil into thirds width-wise, to make it skinnier but without any rough edges. For example, my pie shield might now measure 32 inches long and 1.5 inches wide.
Before baking, carefully wrap the foil around the pie plate edge so that it covers the top crust lip and part of the side the whole way around the pie. Wrap the tin foil loose ends around each other and crush the foil a little to help them stay in place on the pie. Your shield should not be so tight that the foil is in danger of ripping, but also not so loose it will fall off during baking. Also it should be slightly loose enough that you can remove it and put it back on when needed during baking.
*Please, be careful not to burn yourself attaching the pie shield!!
When it comes time to attach your homemade pie shield, unless you can easily reach your pie, pull the pie fully out of the oven (I don’t suggest pulling the rack forward because your custard might go flying everywhere). Quickly attach your pie shield and return the pie to the oven.
Try to do this quite quickly so your pie isn’t out of the oven for a moment longer than necessary. Custard is very finicky!
Troubleshooting Common Pumpkin Pie Problems
OH NO! My pie didn’t turn out! What in the world happened?!
Cracks formed on the pie surface.
Technically it is a sign of over baking, a common issue since custard continues to bake after coming out of the oven.
Solution: Next time, try pulling your pie out of the oven 5 minutes earlier. Also, read the different ways listed down below to tell when your pie is finished baking, for better luck next time.
For now, cover your pie in a mountain of whipped cream, or just enjoy the imperfections of baking.
Seriously though, it can be hard not to get cracks in a custard. Unless the filling has turned rubbery (as long as the pie still tastes good and has a smooth non-chewy texture), this isn’t a huge issue for custard pies, just a bit unsightly.
The custard is undercooked but the crust is overcooked. A Wet-Dry Pie…
Did you use a glass pie plate or a foil one? Nothing overcooks pie crusts like a foil pie plate. This is why many store-bought pies use lard or shortening instead of butter – to withstand the higher heat generated by the foil baking plate.
Solution: Use a glass plate if you possibly can. Also, read the different ways listed below to tell when your pie is finished baking, for better luck next time.
You can also try microwaving your individual serving slices of pie for 30-45 seconds before eating. *Do NOT microwave the foil!* I know this is a completely abominable solution to some, but the microwave can actually cook the custard a bit more while simultaneously softening the hardened crust. This is especially true if your pie collected condensation on top. Better fix than wasting food in this economy, at least in my opinion.
The pie is undercooked. WHY?
- If you used fresh pumpkin, it may have been too watery. The one good thing about canned pumpkin is that by comparison, it has far less water content than fresh puréed pumpkin. You can strain your pumpkin purée through a cheesecloth to remove some of the water (just save that strained liquid for making soup!). Roasting your pumpkin instead of steaming can also help remove some of the moisture from the fresh pumpkin.
Other reasons for an undercooked pie….
- The oven door was open for too long and all the hot air was let out.
- Baking too many pies at once. You can google it for more exact information, but if you’re baking multiple pies at once, I believe you need to compensate by raising your oven temperature for both baking temperature stages.
- Your pie wasn’t baked in the lower third or centre of the oven.
- The pie is overfilled with too much custard. A 9″ pie plate requires about 4 cups of filling, generally speaking. You can also aim to fill your pie with filling up until a 1/2 inch from the top of the pie crust, as a rough measurement.
Solution: Read the different ways listed below to tell when your pie is finished baking, for better luck next time.
Next time you can also try blind baking your pie crust first, and then baking the custard at a lower temperature (300˚F) for a longer time duration (70-90 minutes) – definitely use a pie shield for this method!! I’d suggest also adding a little extra butter to your crust for this case – just a tablespoon or two. Definitely try straining some of the water out of your pumpkin purée though; makes a big difference!
WAYS TO TELL YOUR PIE IS PROPERLY FINISHED BAKING….
- The custard is still a tiny bit jiggly in the very centre, but not around the edges, and certainly it should not be in any way liquid-y. The pie will continue to cook out of the oven once it’s finished baking, so be careful not to overcook the custard by accident.
- Try stabbing your pie in the centre with a cake tester, knife, or toothpick. It should come out cleanly without loads of custard on it. Be warned, this will leave a stab wound in your pie!
- Another stabbing method – insert a baking thermometer into the pie. The custard is done when it reads at least 170 ˚F in the centre. There’s a very tight Goldilocks temperature range here for pumpkin pie though. If the custard temperature reaches above 176˚F the pie will begin to overcook, to crack and curdle.
- The pie custard is cooked when it has darkened in colour. The custard should also have a slightly puffed, domed edges (this doming will fall once the pie is taken out of the oven; this is normal).
Spiced Sweet Pumpkin Pie
Spiced and sweet, this pumpkin pie is a delicious treat to eat. This fabulous dessert can follow any autumn or winter dinner, or you can just have a slice for breakfast!
It’s a great way to use up fall pumpkins, or use canned pumpkin in a pinch. It’s ready pretty quick too, as it only takes about 45 minutes to assemble the pie and another 45 minutes to bake it (excluding pumpkin prep time). It even works to prep the pumpkin puree for your pie ahead of time and freeze it until you need it later.
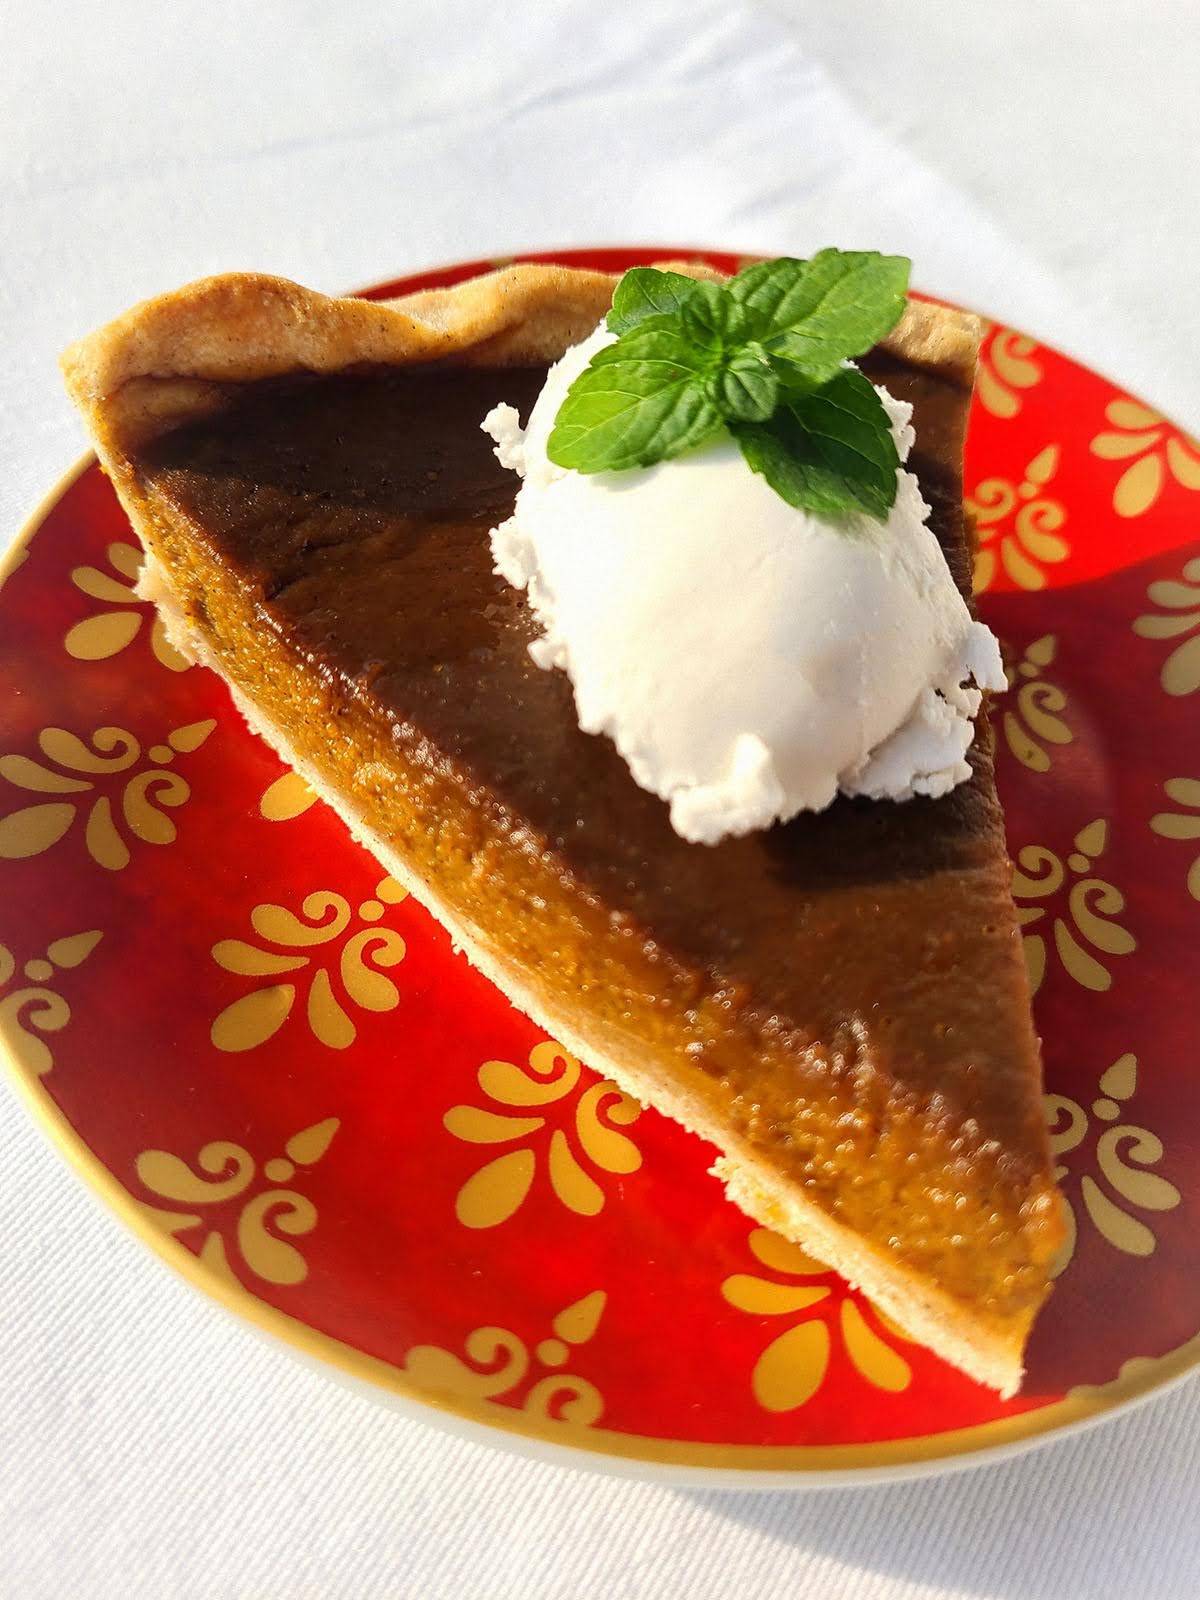
Top your pie off with this whipped cream recipe for an even sweeter treat, or just eat it plain and simple.
Did you make my family pumpkin pie recipe? Let me know!


Leave a comment